Update the nursery walls with these easy painting techniques
Decorating a child’s room is a fun project because if there’s one space where you can take a leap of imagination, this is it.
As the nursery is often one of the smallest rooms, it can be tempting to stick to white to make it appear larger.
There is a common misconception that neutral colour schemes are more soothing, and so are better suited to aiding peaceful sleep.
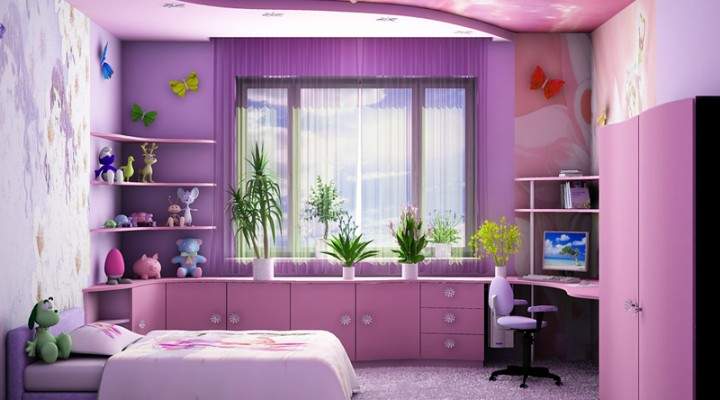
Colour can be calming and an interesting feature wall can enhance the space, providing a room in which a little one can thrive.
A nursery with a little personality also creates an inviting space for parents to spend time with their baby.
Decorative feature walls are quick to achieve and inexpensive. Here are three ideas for getting creative in the nursery using Dulux colour palettes.
Dulux Wash & Wear is easy to clean and is low in VOCs (volatile organic compounds) so it’s well suited for children’s rooms.
Retro stripe
A graphic diagonal stripe sets the tone for a bright and cheerful bedroom.
The colour is bold, but using plenty of white balances the look so that the yellow doesn’t dominate.
You will need paint, brushes, a small roller, a long ruler, a pencil, a piece of chalk, a reel of chalk line and masking tape.
For 300mm stripes, use the chalk and ruler to mark a line from the bottom left corner to the top right.
With the ruler and pencil, mark 150mm and 300mm intervals along the bottom and left side of the wall. Repeat with the top and right side.
Use the chalk line to mark the lines of the stripes. Mask along the lines remembering to alternate between masking on the left side of the line, then the right side.
Apply two coats of paint with a brush or small roller. When dry, remove the masking tape.
Forest friend
Get back to nature with this tree theme featuring a friendly owl in the branches. Three different shades of the same colour add depth.
You will need three shades of paint, brushes, a tape measure, a large ruler, a pencil or piece of chalk, masking tape and an animal decal.
Using the ruler and chalk, mark where the trees will be. Start narrow at the top and get wider as you go down. Next, draw in the branches.
TIP Using chalk means mistakes can be easily corrected.
Mask around the two outside trees and, using a small brush, paint in the lightest shade.
Change brushes and repeat with the next tree and darker shade, finishing with the darkest and largest tree in the centre.
Apply two coats of paint to each tree, drying between coats. Then add the decal.
Painting on a few leaves gives it a whimsical feel, but keep the decoration minimal to maintain the focus on the trees and to ensure the end result is modern and fresh.
Washing line
This sweet decorative effect uses real clothes alongside stencils for a textural and quirky finish. You will need white paint and a brush, a pencil, scissors, stiff card, a couple of items of baby clothing and some wooden pegs.
Choose a few items of clothing and trace around them in pencil onto stiff card, then cut out the stencil. Mark a line on the wall for the clothesline, then trace around the stencils so they look like they are hanging on the line.
Paint the stencils white using a small brush. When dry, hang a couple of real outfits to the line using Command Picture Hanging Strips, adding a few stitches if needed. Use Blu Tack to attach wooden pegs to finish.